Pose AI Guide
How to Pose for Pictures Using a Camera Guide
To pose for pictures, set the camera and crop first, then build the body from the ground up: shift your weight, turn slightly, place your hands, and relax your expression. Small changes are easier to repeat than one complicated position.
Reviewed July 29, 2026
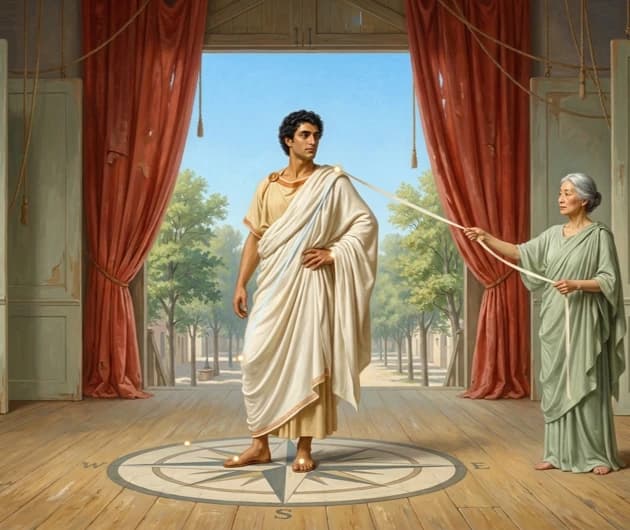
Set Three Things Before the Shutter
A comfortable picture starts with the frame, one clear body line, and hands that have a reason to be there.
Frame the shot
Choose the crop, camera height, distance, and background before adjusting your body. A strong stance cannot rescue a frame that cuts at the wrong place or leaves distracting objects behind you.
Build one clear line
Stand or sit tall, let one side carry more weight, and turn only as much as the picture needs. A small difference between the shoulders, hips, or feet creates shape without forcing it.
Give every hand a job
Rest a hand lightly on a pocket, collar, bag, hair, or another person. Keep the fingers easy and the contact soft so the placement reads as intentional rather than tense.
A repeatable method
A Step-by-Step Method for Natural Posing
Work in this order so you are not trying to fix the camera, stance, hands, and expression at the same time.
- 01
Choose the crop and camera job
Decide whether the picture is a close-up, upper-body portrait, or full-body shot. Then decide who holds the camera: you at arm’s length, you through a mirror, a friend, or a tripod.
That decision controls how much room you need, which lens faces you, and whether the phone itself belongs in the composition. Make it before you start arranging the pose.
- 02
Find soft light and a quiet background
Turn toward a broad, indirect light source such as an open window or bright shade. Check the preview for deep eye shadows, squinting, or a bright background that leaves your face too dark.
Scan the edges behind you as carefully as the center. Move the camera or your position when a pole, branch, bright sign, or clutter competes with the subject.
- 03
Set height and distance before your stance
Place the camera at the height that supports the intended picture, then step forward or back until the crop is right. Avoid solving a distance problem by leaning your whole body toward or away from the lens.
Perspective changes when one body part sits much closer to the camera than another. Check hands, knees, and feet near the edge of a wide shot before treating the body position as final.
- 04
Lengthen your posture, then release tension
Grow upward through the top of your head, keep your ribs comfortable, and let your shoulders settle down. The goal is supported posture, not a rigid chest or locked back.
Take one slow breath and loosen your jaw, fingers, and knees. Tension often appears first in those small places even when the overall position is correct.
- 05
Shift your weight and add a slight turn
Let one leg carry more of your weight and soften the other knee. For many portraits, turning the torso a little while bringing the face back toward the camera creates depth; a square stance can still work when you want symmetry or a stronger, direct feeling.
Treat the turn as a starting point rather than a rule about how your body should look. Compare both sides and keep the version that fits the mood, clothing, crop, and available space.
- 06
Place your hands and settle your expression
Choose hand placement that belongs to the scene: a loose pocket, jacket edge, bag strap, sunglasses, hair, hip, prop, or gentle connection with another person. Avoid pressing hard into the body or flattening every finger toward the lens.
Once the hands stop moving, relax your mouth and eyes. Look into the lens for a direct portrait, or choose one specific point off-camera for a candid direction instead of staring into empty space.
- 07
Change one variable at a time
Take a short sequence, review it, and adjust only the clearest problem: camera height, crop, weight, shoulder angle, hand placement, chin, gaze, or light. Keeping the other choices stable shows whether the change actually helped.
Repeat until the picture feels deliberate without feeling held. You do not need a perfect universal position; you need a setup you can understand and reproduce.
Camera setup
Adapt the Method to Who Holds the Phone
The same body direction behaves differently in a selfie, a mirror, and a camera placed across the room.
Front camera
Keep selfie changes compact
At arm’s length, small head, shoulder, and hand adjustments make a large difference inside a tight frame. Set your crop before moving your face closer to the lens, and check that the capture matches the mirrored preview you expect.
Back camera + mirror
Treat the phone as part of the shape
In a mirror picture, phone height, wrist angle, reflection, and body placement share the same frame. Clean the mirror, simplify what it reflects, and decide whether the phone should cover, border, or sit away from your face.
Tripod or another person
Mark the frame before stepping in
For a full-body or direct portrait, leave deliberate space around the feet and head. Use an object or floor mark to remember where to stand, then ask the photographer to keep the camera position stable while you make small adjustments.
Inside Pose AI
Turn Advice Into Live Adjustments
A written checklist helps before the camera comes up. A guide in the viewfinder helps when you need to reproduce the shape while watching the actual frame.
- 01
Pick a card for the shot
Each card belongs to a specific selfie, mirror, or direct setup and a close-up, upper-body, or full-body crop. Choose the composition before opening the camera instead of improvising every detail at once.
- 02
Fit the guide to your frame
Pose AI places a transparent frame over the live camera. Drag, pinch, adjust opacity, or mirror the guide until its scale and position match the phone distance and crop you have chosen.
- 03
Follow the current cue
Depending on the selected card, on-device analysis can check framing, stance, body turn, shoulder or hip tilt, head direction, gaze, hands, or expression. The coach surfaces the next useful correction rather than asking you to remember the whole checklist.
- 04
Hold the match for capture
For scored cards, automatic capture waits for an eligible match to hold instead of firing on one passing frame. Timer mode remains a manual choice. With add-only Photos permission, the finished image is saved to your Apple Photos library.
Fix the Reasons a Position Feels Awkward
Most stiff photos come from solving the right problem in the wrong order.
Moving before the frame is set
If the camera height or crop keeps changing, you cannot tell whether the body adjustment worked. Lock the frame first, then direct the subject.
Holding every joint still
Straight elbows, locked knees, raised shoulders, and clenched fingers create visible tension. Keep support in the posture while allowing small bends and natural breathing.
Placing hands without context
A hand looks uncertain when it floats near the body with no clear relationship to clothing, a prop, or another person. Give it a destination and use light contact.
Changing everything after each shot
Large random changes make it hard to learn what works. Keep the setup stable and adjust one variable, then compare the result.
Questions About Posing for Photos
Short answers to the decisions that usually make people freeze in front of a camera.
How do I pose naturally in pictures?
Start with something your body can actually hold: balanced feet, relaxed shoulders, soft joints, and a clear place for each hand. Add a small turn or weight shift, then breathe before the shutter. Natural does not mean unplanned; it means the position still allows ordinary movement and expression.
What should I do with my hands in photos?
Give each hand a light, believable task. Use a pocket, collar, bag, hair, sunglasses, prop, chair, or gentle contact with another person. Keep fingers relaxed and avoid pressing hard against your body. If the hands do not matter to the picture, choose a tighter crop instead of forcing them into view.
Should I face the camera straight on?
A slight turn often adds depth, but a straight-on stance can create a strong, symmetrical portrait. Choose based on the intended mood rather than a rule about looking flattering. Try both while keeping the camera and crop fixed, then compare the shoulder line, face angle, and overall shape.
Where should the camera be for a portrait?
Begin near eye or chest height depending on the crop, then adjust for the effect you want. More important than one universal height is consistency: set the camera, check the background and edges, and change distance before bending or leaning your body to fit a poor frame.
How can I stop looking stiff in photos?
Release tension in the shoulders, jaw, hands, and knees, then introduce a small action such as shifting weight, adjusting a cuff, looking toward a fixed point, or taking one step. Use a short sequence so your expression can settle instead of trying to manufacture one perfect instant.
How does Pose AI help me match a pose?
Pose AI puts a transparent guide over the live iPhone camera and analyzes the selected card’s declared signals on-device. It can cue framing, body or face direction, hands, gaze, and expression when those details belong to that card, then automatically capture a scored pose after the match holds.
Sources and Further Reading
The practical guidance above was checked against portrait instruction available from these photography sources.
Practice with the guide in the frame
Choose a card, fit the guide to your camera, and work through one visible adjustment at a time.